


Tired of static displays? Transform your digital signage with the power of Arduino and IoT sensors! By integrating Arduino controllers and the versatility of IoT sensors with OptiSigns' Lift & Learn feature, you can create a dynamic and engaging customer experience that boosts interaction and drives sales.
In this blog, we'll explore how to set up an Arduino board with an RFID IoT sensor to deliver personalized content and create truly interactive displays that captivate your audience on the OptiSigns Digital Signage Platform.
What is Lift & Learn?
Imagine you're in a store, browsing through different products on a shelf. You pick one up to get a closer look, and suddenly, a nearby screen displays a video showcasing the features of that specific item and how it can benefit you!
That's Lift & Learn in action. It's a cool technology that uses sensors to know when you pick up an item, and then it automatically shows you tailored content on a screen. This might include things like videos, reviews from other customers, or even comparisons to similar products.
Lift & Learn not only enhances the customer experience by providing relevant information at the moment of interest but also helps businesses increase engagement, drive sales, and create memorable interactions.
Here’s a brief walkthrough of an Arduino RFID IoT sensor we built and integrated with OptiSigns Digital signage platform.
Getting the Tools Together
Before we start, we’ll need to gather the following tools necessary for this build.
Tools: (You may not need all tools listed below)
- Personal protective equipment (PPE)
- Solder
- Soldering Gun
- Female-to-Female wires (optional)
- Male-to-Male wires (optional)
- Male-to-Female wires (optional)
- Breadboard (optional)
While we're focusing on an RFID IoT sensor today, don't forget that a wide variety of sensors can be integrated with your digital signage. From motion sensors that detect customer presence to environmental sensors that respond to changes in light or temperature, these tools open up exciting new possibilities for creating dynamic and engaging displays.
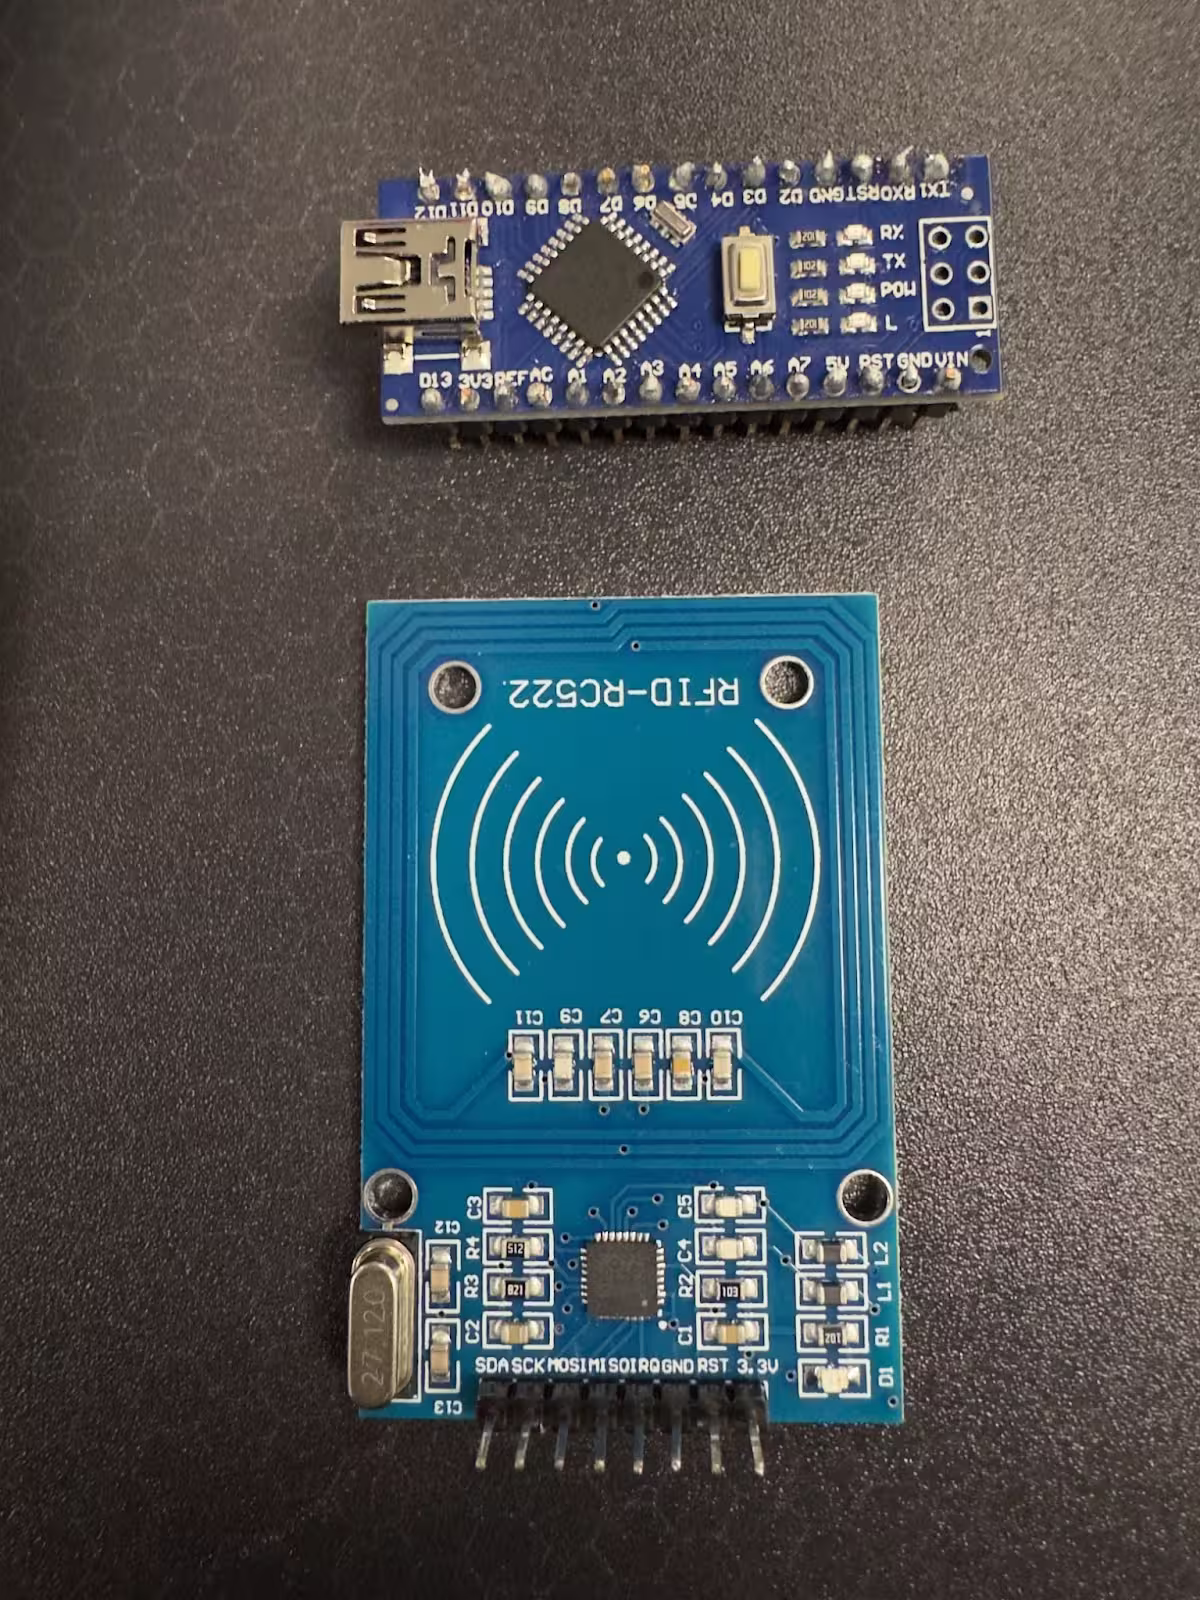
For our setup, solder and a soldering gun are necessary to connect the components securely. See image below of how we soldered this Arduino board together.
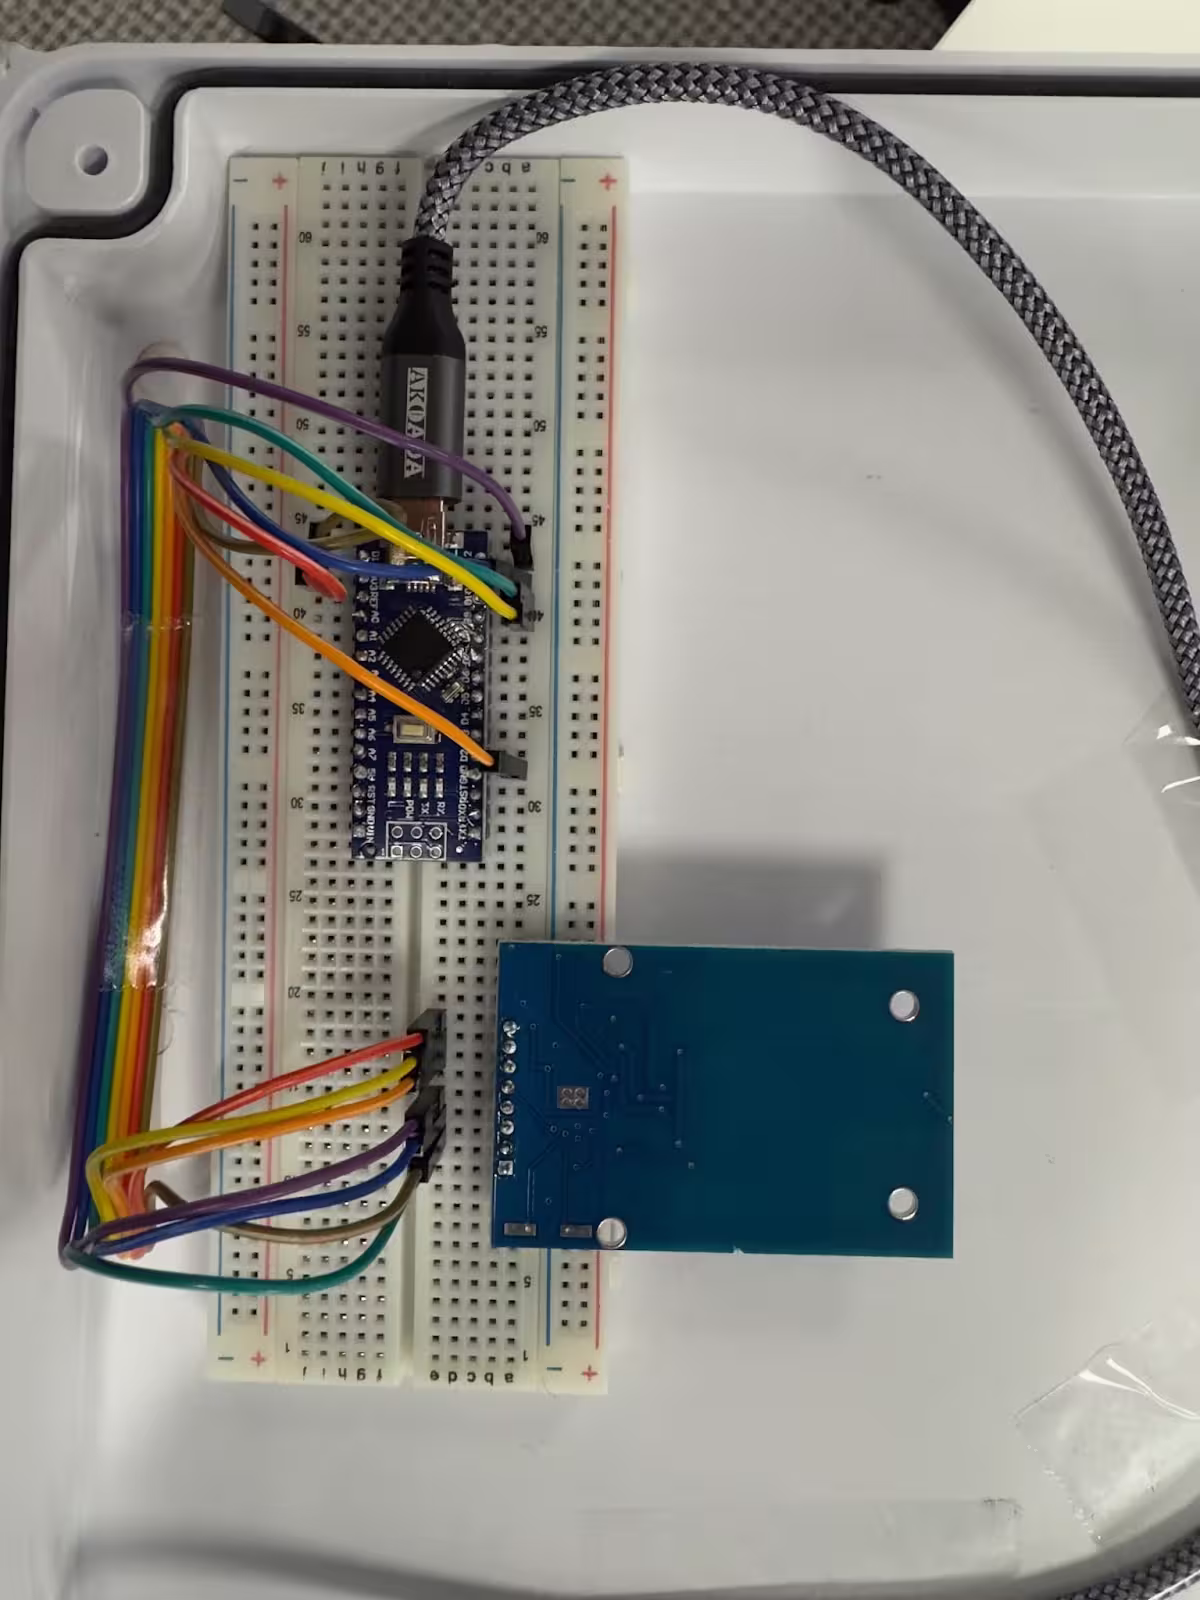
Wiring the Sensor
Connect the wires to the correct pins as shown below:
Pin
Connection
3.3V pin
3.3V pin
RST pin
Pin 9
GND pin
GND pin
MISO pin
Pin 12
MOSI pin
Pin 11
SCK pin
Pin 13
SDA pin
Pin 10
The wires and breadboard provide flexibility in designing your circuit and making connections easier to manage, especially for beginners. Here's an example of how we wired our Arduino controller and RFID reader on a breadboard:
Programming the Sensor
Once your wiring is complete, connect the device to your desktop or laptop and program it using the Arduino IDE. This platform is widely used for its ease of use, extensive community support, and compatibility with a variety of hardware. This makes it an excellent choice for beginners and advanced users alike.
Steps:
1. Install Arduino IDE
- Download Arduino IDE and install it.
2. Configure Arduino IDE
- Open Arduino IDE, create a new sketch, and navigate to Tools > Board > Arduino Nano.
- Go to Sketch > Include Library > Manage Libraries and install the `MFRC522` library (or the one your sensor requires).
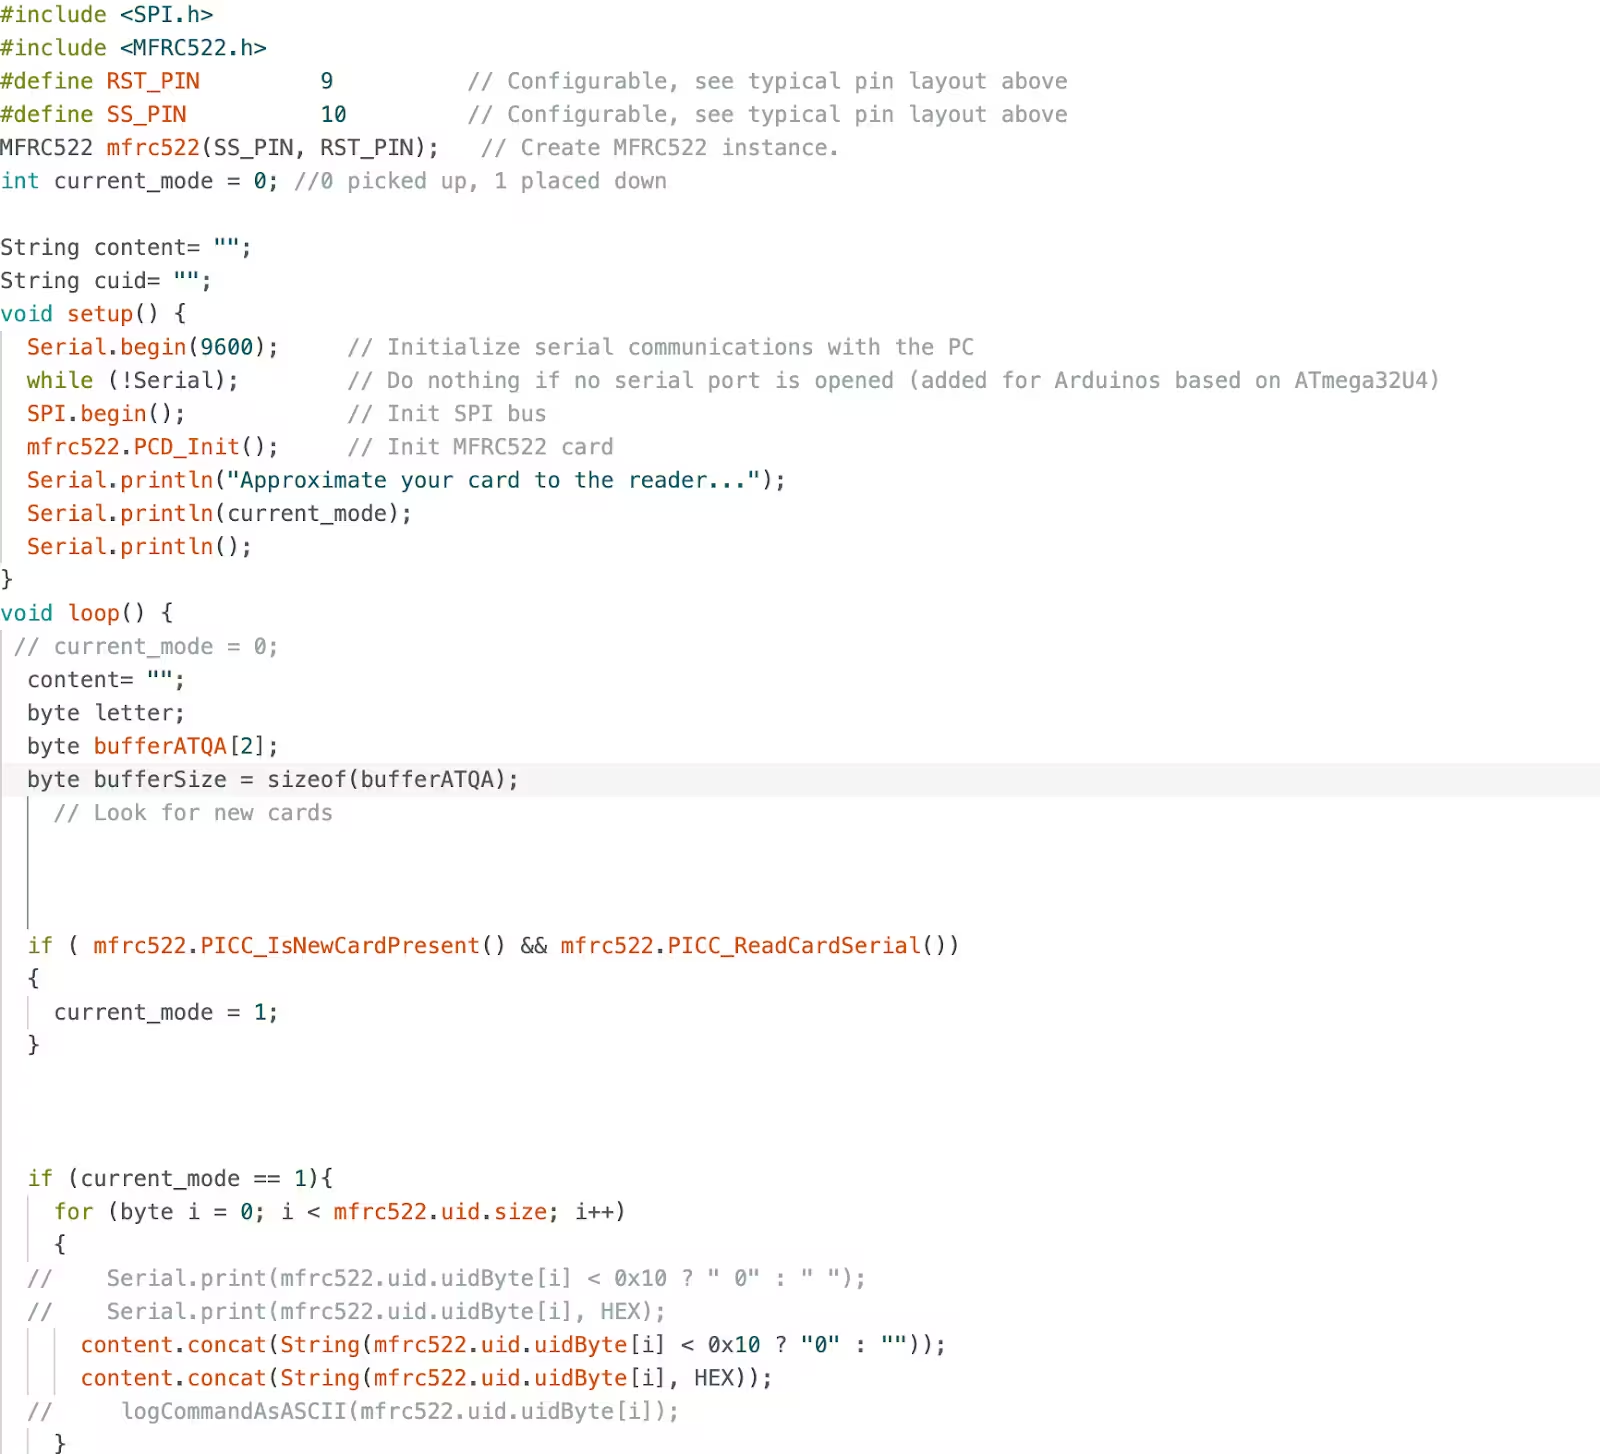
3. Write and Upload Code
- Create a sketch that works for you. (See example of my sketch below)
- Verify the code by clicking the checkmark.
- Upload the code by clicking the forward arrow.

4. Test Your Sensor
- Place an RFID card on the sensor and view the output in the Serial Monitor to confirm the setup.
Configuring the Engage App in OptiSigns
Once your sensor is ready, it is time to set up the Engage app to link your IoT sensor and screen together.
Steps:
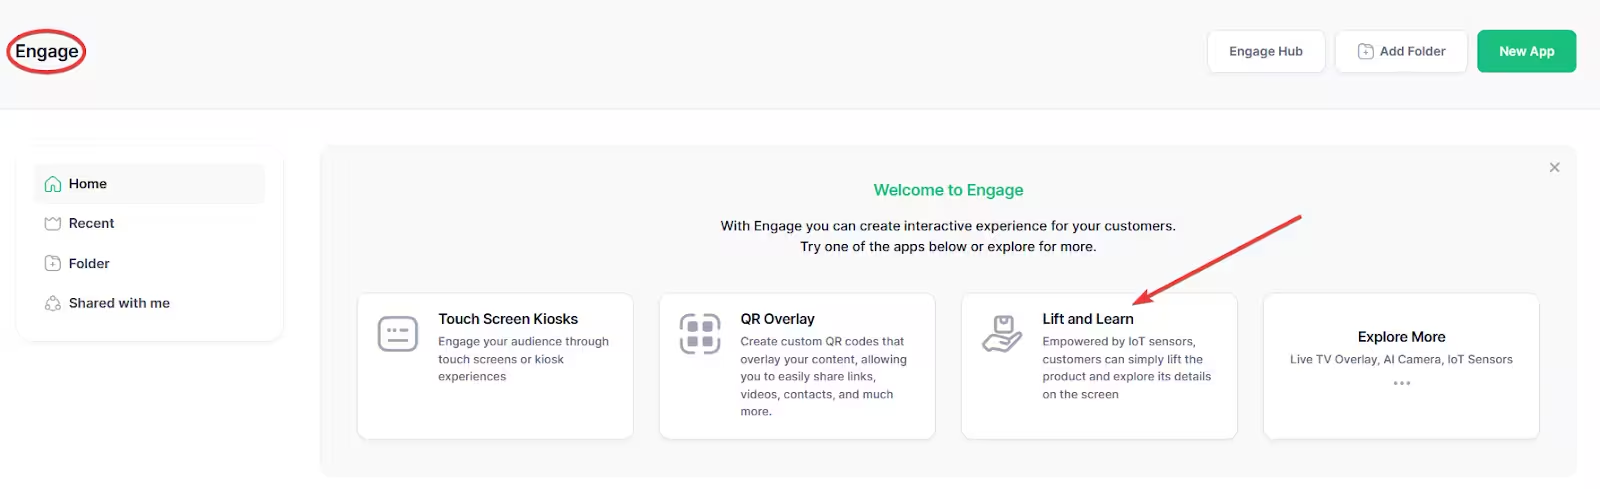
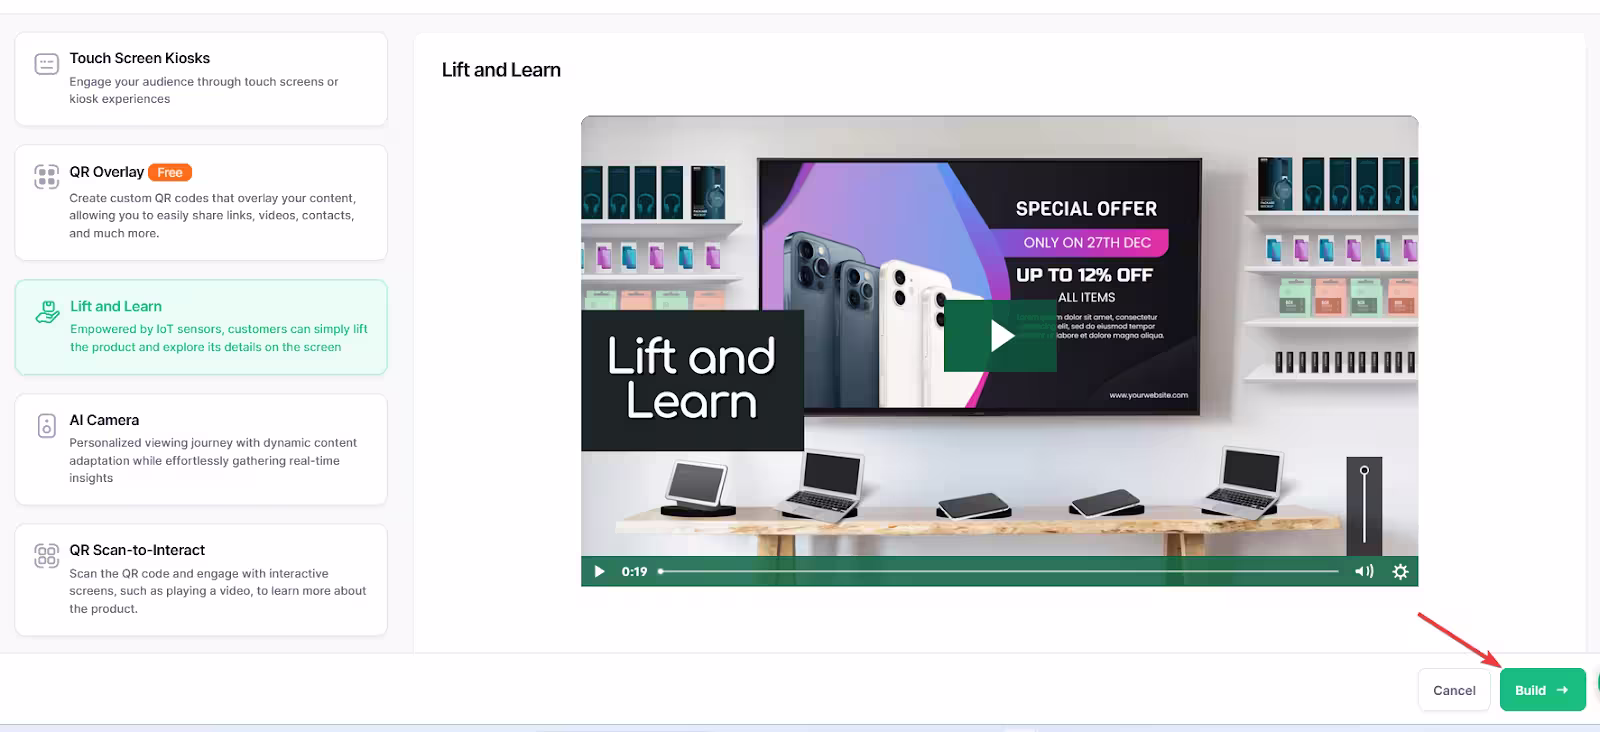
1. Create a New Engage App
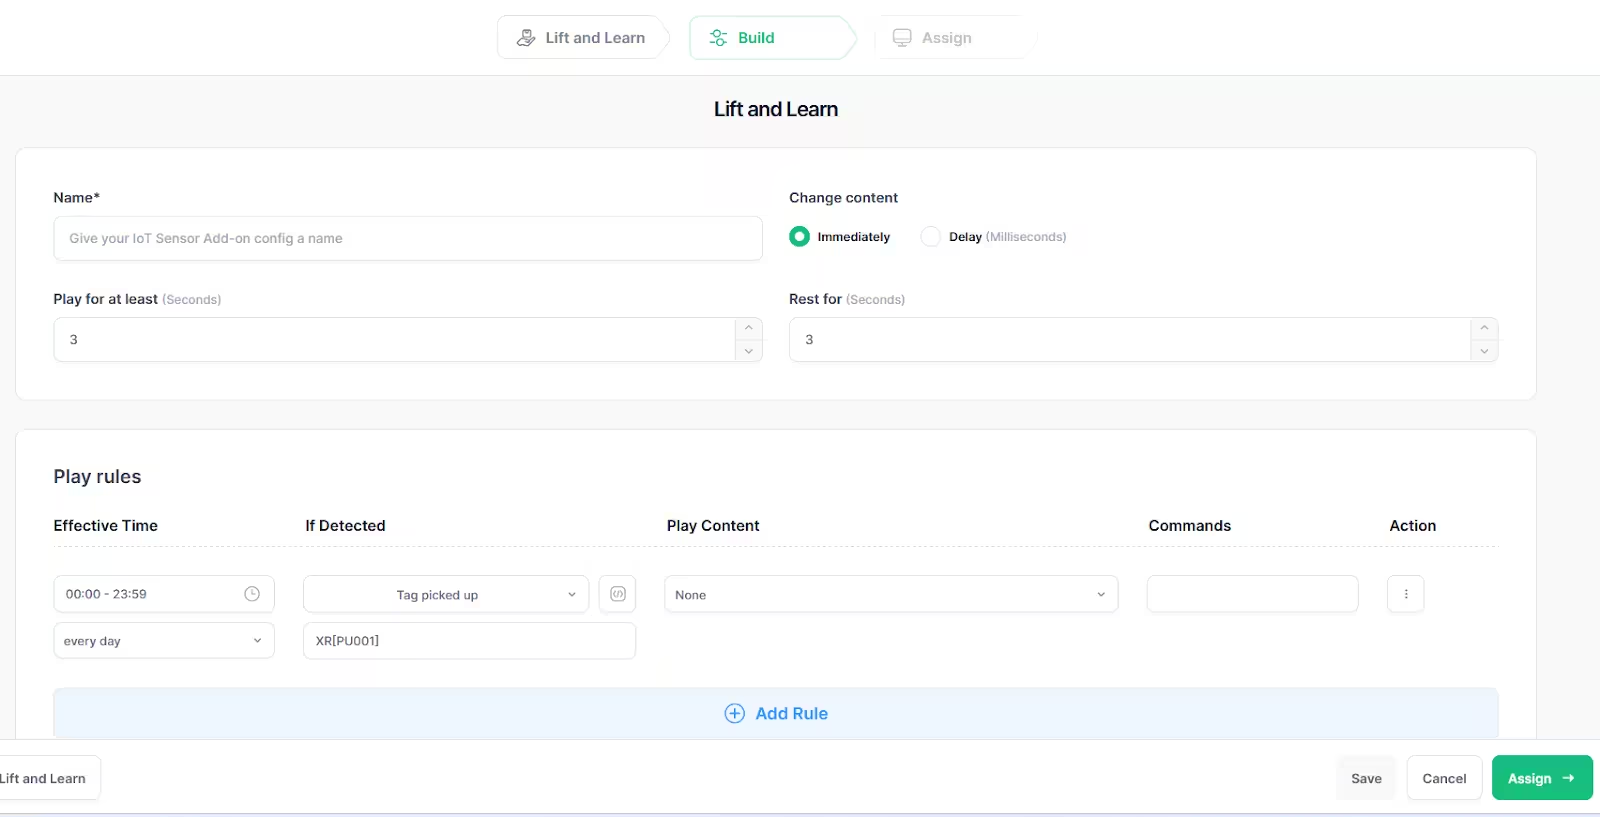
- Navigate to Engage > New App > Lift & Learn > Build.
- Name your app.
- Set “Play for at least” and “Rest for” durations.
- Use the commands tested earlier to configure content triggers.
- Save your app.
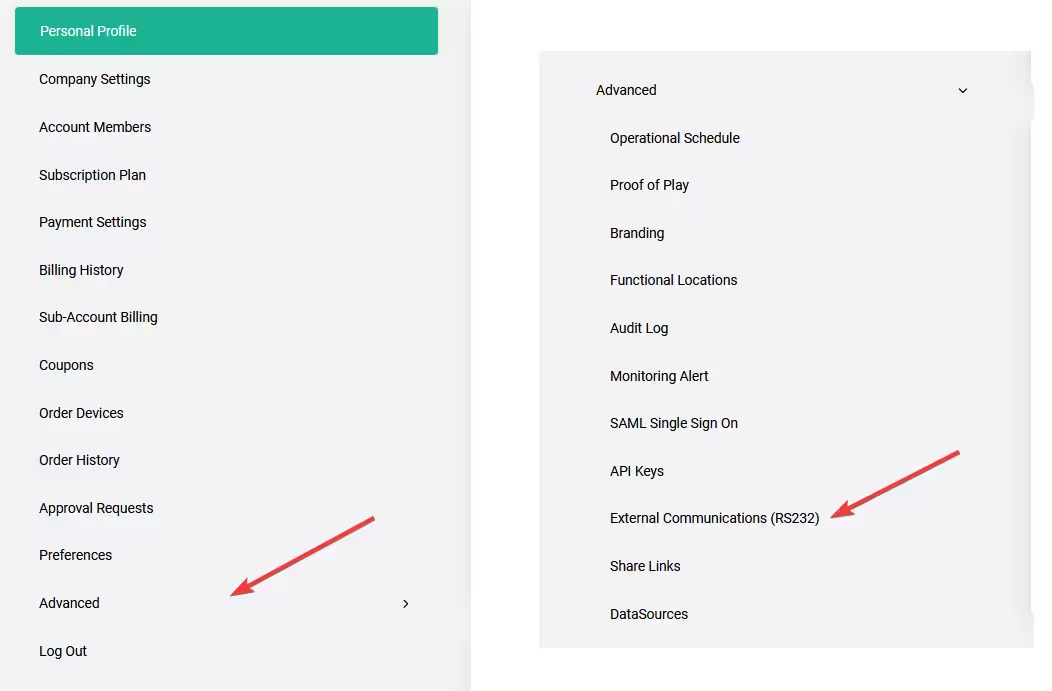
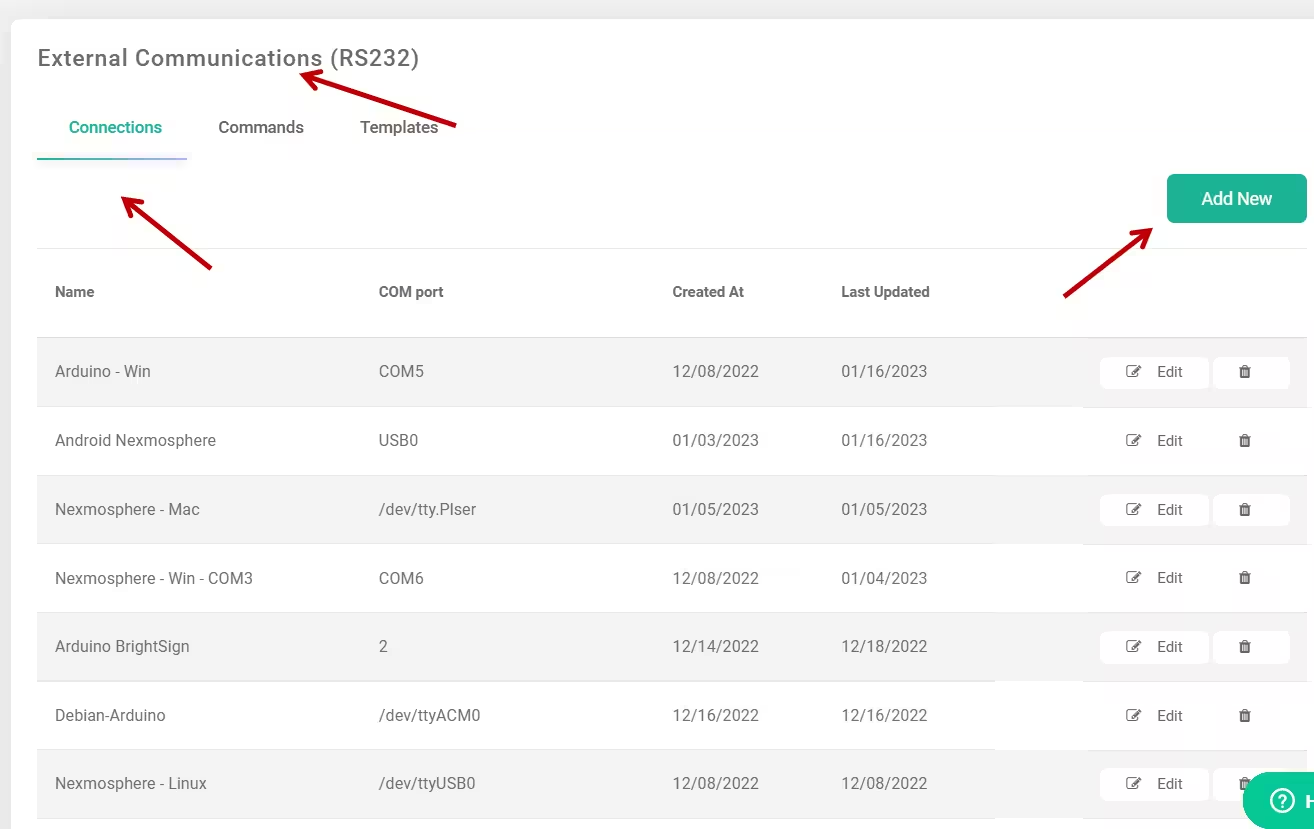
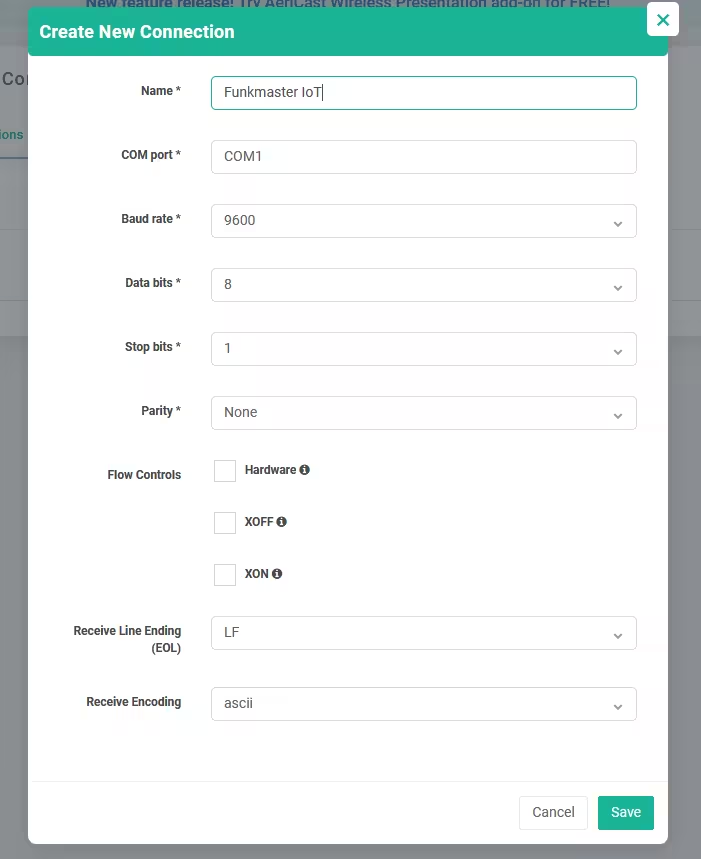
2. Set Up External Communications (RS232)
- Go to Advanced > External Communications (RS232).
- Select Add New and fill out:
- Name: Descriptive name for your sensor.
- COM Port: Use “USB0” for Android players or “/dev/ttyUSB0” for Pro players.
- Baud Rate: 9600 for Android players or 115200 for Pro players.
- Save the profile.
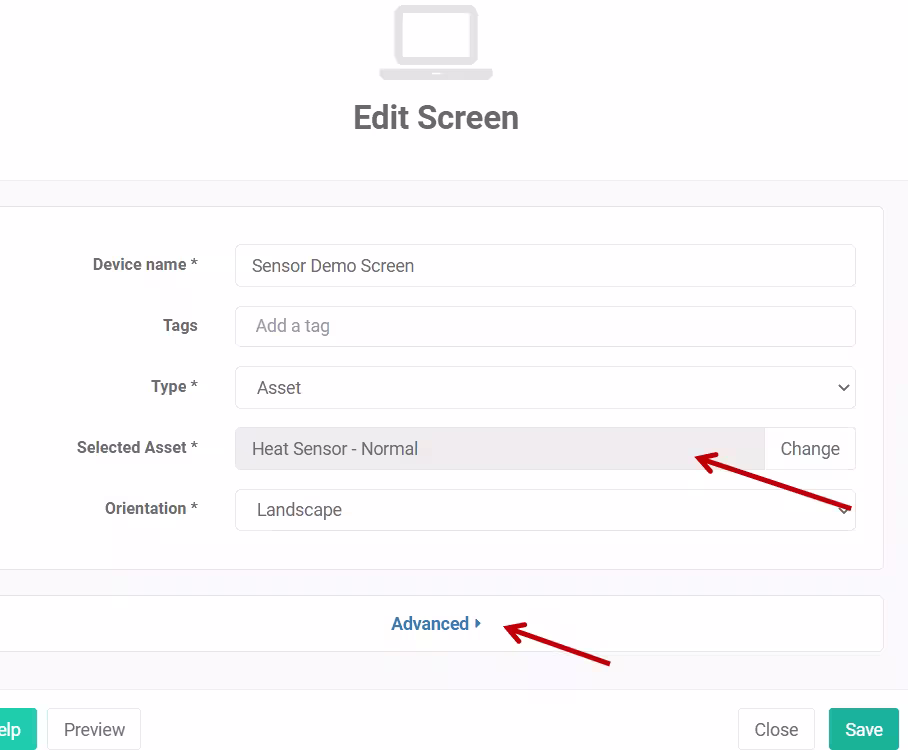
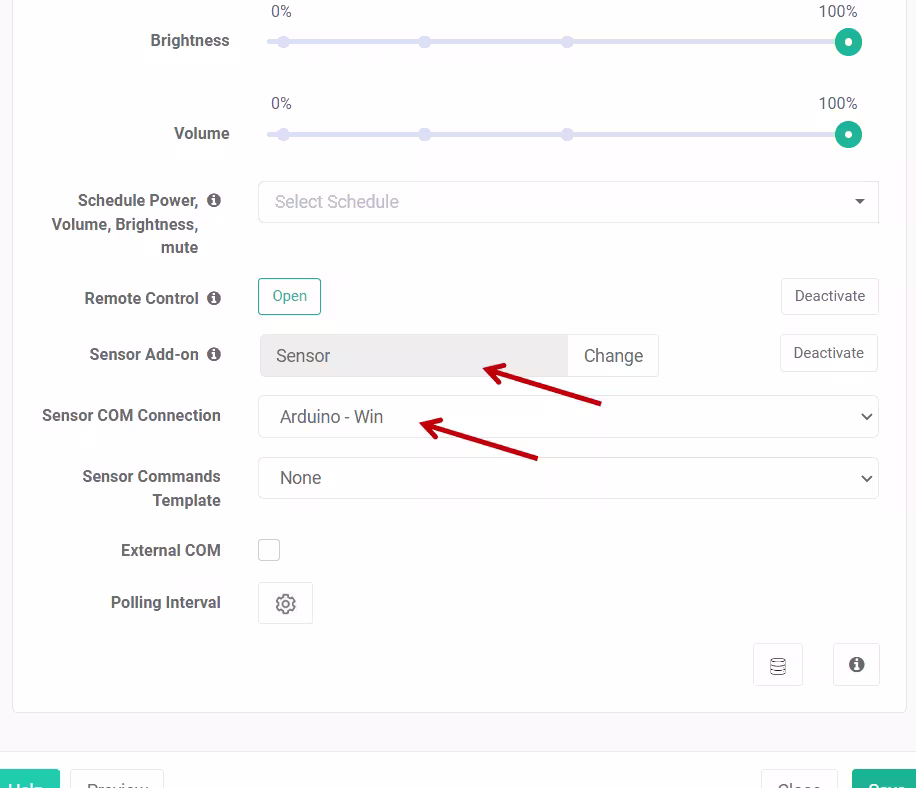
3. Assign the App to a Screen
- Select the screen you want to use.
- Assign content as usual.
- Go to Advanced > More and activate the Sensor Add-on
- Select Engage, choose your app, and link the COM port.
- Save the configuration.
Final Testing
Place an RFID card on the sensor and verify that the screen changes content dynamically based on the commands received.
As you've seen, setting up Lift & Learn with Arduino, IoT sensors, and OptiSigns is a breeze! By combining the versatility of Arduino with the power of OptiSigns, you can create truly interactive and engaging experiences that captivate your audience and drive results.
Remember, this technology not only enhances the customer experience by providing timely and relevant information but also empowers businesses to boost engagement and increase sales.
Ready to transform your experience with Lift & Learn? Start creating amazing interactive experiences today! Reach out to our team for support! With Lift & Learn, the possibilities are endless.
Download the app today and see how easy it is to get started!
For more information on set up click here.


